::welcome::

MAKEUP :: FASHION :: STYLE :: FUN

CLICK HERE TO JOIN ME ON YOUTUBE
CLICK HERE TO LIKE ME ON FACEBOOK

Saturday, April 16, 2011

Spring 2011 Outfit of the Day: Layered Cropped Tank (Day to Night)

One of the latest Spring trends to hit the streets is cropped tops. I'm personally not a huge fan of them because they immediately give me flashbacks of every traumatic fashion experience growing up in the 80s. For some reason when I see a cropped top, my mind immediately conjures up a disturbing image reel starring George Michael in a pink headband and exercise gear and Tom Selleck as Magnum P.I. running in slow mo in short shorts. Gross. Does it make me old that I remember a time when we joked about how the 80s would never return and thanked our lucky stars that it was just a terrible mistake? Well, for a few years now, 80s fashion has been creeping its way back onto the scene. Right now I'd say it's hitting us hard, what with all the cropped tops, bright neons, and clashing florals dominating the runway. I must say though, designers have updated these once-disastrous fashions into something more modern and wearable. Only in small doses of course. Meaning, if you walk into Forever 21 right now it looks like a garden threw up.


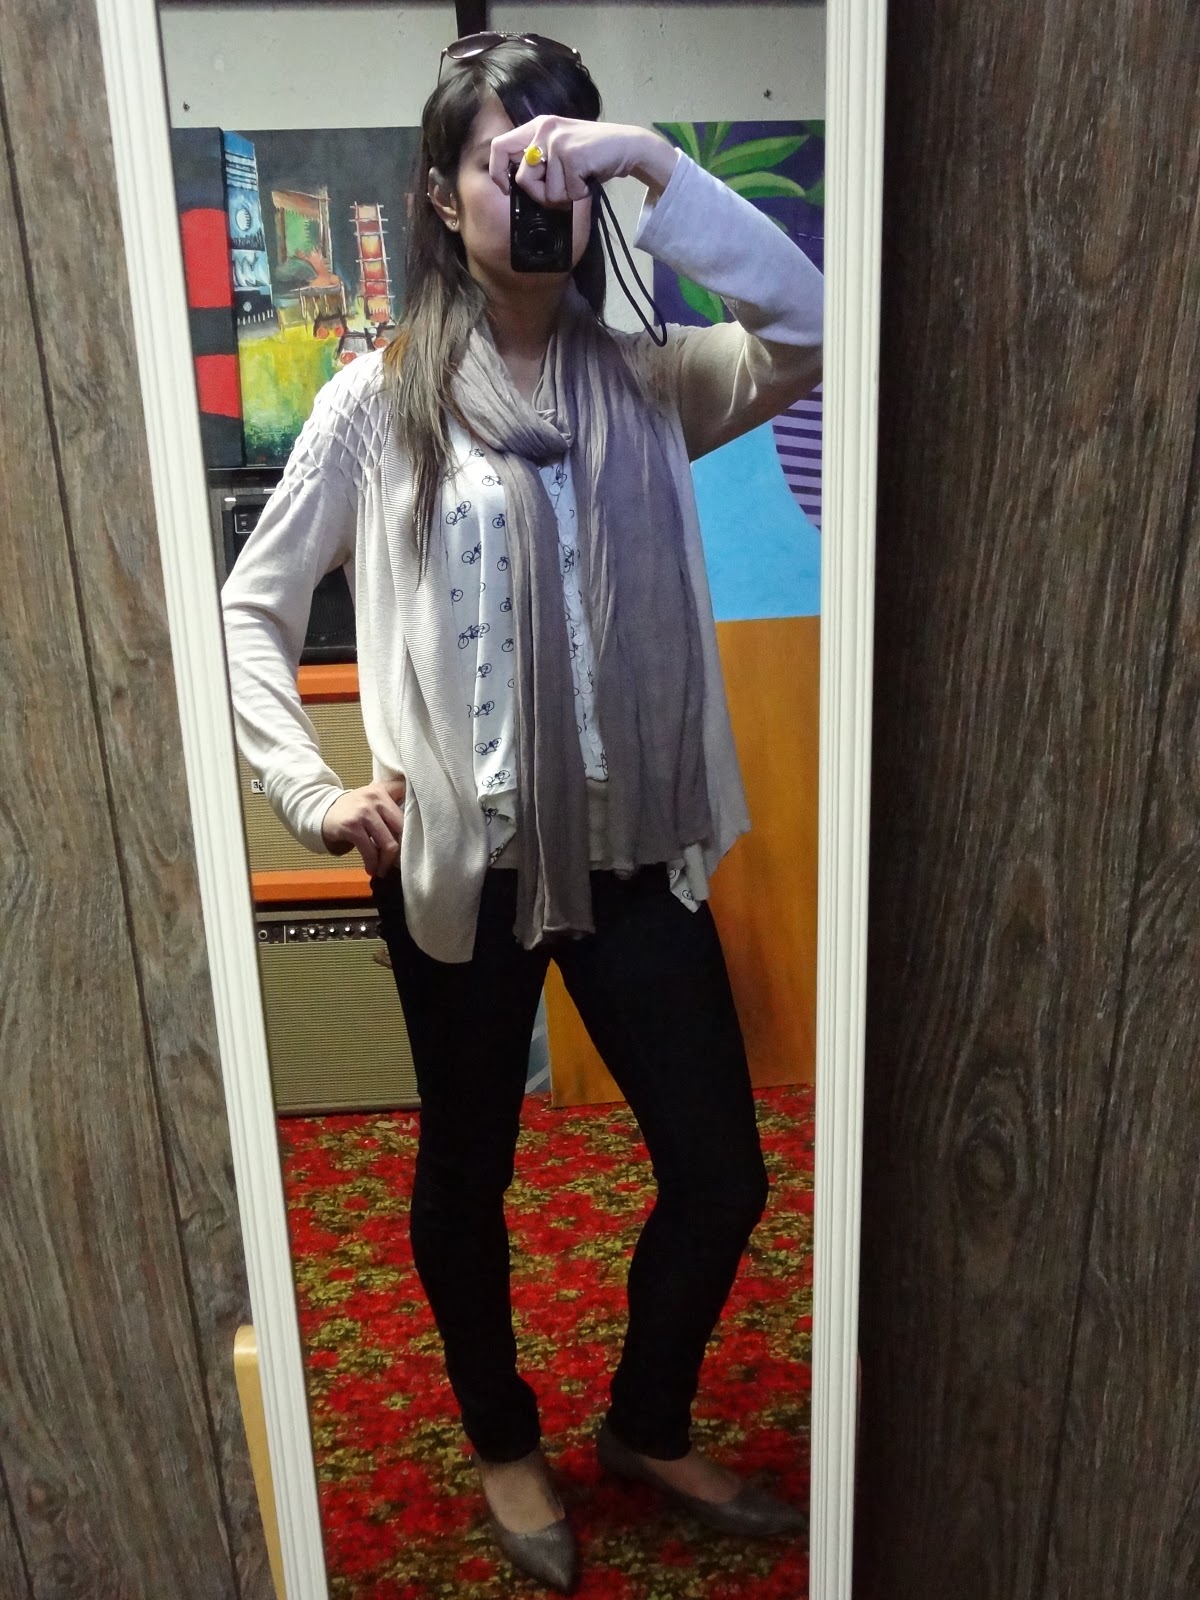
But I digress. Here are some examples of how I incorporated this Spring's trends of cropped top, neutral palette, and nautical theme. The cut of this Forever 21 tank is cute but I didn't feel ready to sport it alone. I feel like you have to be stick skinny to really pull off this look without risking potential "pregnancy chic". So I brought it into my comfort zone by creating a slimmer silhouette through layering. I'm not going to lie, I bought this tank mainly because I loved the little blue bicycles on it. My actual train of thought (much like my dog's when he sees food): "Wait, are those bicycles? Bicycles? Yes! Yes they're bicycles! SO cute!! I definitely don't have anything in my closet that has BICYCLES on it. How interesting! Bicycles?? SOLD!" LOL. But besides the super kawaii factor, I like the paradox of how it channels Spring's trendy nautical theme through a land-based mechanism. Mindblasting!


::DAYTIME/CASUAL::

Flats like Toms are both practical and stylish. Great for walking around all day running errands. I like to wear a purse from my array of slouchy bags like this one from Coach.


::EVENING::

Trade the Toms and purse for heels and a clutch.


::WATCH THE VIDEO::

Thursday, April 14, 2011

Spring 2011 Outfit of the Day: Belted Denim Shirt (Day to Night)

Oversized shirts and leggings is one of my favourite street styles. Here's how I accessorized a simple belted denim shirt look. I added a bluish grey scarf to maintain a relatively monochromatic foundation for the outfit. I like to add punches of colour with chunky statement jewellery so for my accent piece I chose gold studded turquoise earrings from Forever 21. Because of my yellowish skin tone, I tend to gravitate towards warm golds and bronzes - gold-framed aviators, watch, ring, earrings, and belt tie the look together and warm up the blue greys. To complete this outfit, I would wear my small brown H&M over-the-shoulder saddle bag or my wardrobe staple bronze Coach purse (not shown).


::CASUAL DAYTIME::


To quickly and easily take this look into evening, simply change a few accessories. I recommend transitioning the look with heels and perhaps a more glamorous scarf (not shown, but any scarf in a finer material would immediately add texture and elegance to the look). A sleek clutch (not shown) would complete the outfit.

::EVENING::


::WATCH THE VIDEO::

Wednesday, April 13, 2011

Food Tips for Healthy Skin!

The Fashion Spot recently did a piece on "Eating Your Way to Healthy Skin". Because this list of foods and their positive effects are so handy, I went ahead and summarized it for you.


::OMEGA-3 FATTY ACIDS::
The healthy fat found in fatty fish like salmon, tuna, olive oil, flax seeds, walnuts, tofu.
Helps skin retain moisture and prevent dry skin, wrinkles, fine lines.
♥ Contains protective monounsaturated fats, which has been shown to reduce risk of skin cancer when consumed in place of saturated fats.


::ZINC::

Zinc-rich foods like oysters and lean meats can help tame oily skin.
Such foods have been shown to reduce oil production, help heal minor cuts and scrapes.


::VITAMIN C + E::

Vitamin C found in citrus fruits (e.g. oranges, grapefruits) prevents immune deficiencies like colds.
Vitamin C has been shown to help fight wrinkles.
Vitamin C combined with Vitamin E (found in avocados, almonds) creates an antioxidant effect to help protect skin from sun damage.
Vitamin C + E work together to aid in preventing and repairing cell damage.


::VITAMIN A::

Greatest effect on skin when eaten in form of leafy dark greens (e.g. spinach, kale).
Popular in beauty products for its anti-aging benefits


::FLAVONOIDS::

♥ Foods like dark chocolate, berries, bananas, citrus fruits, dill, broccoli, pistachios.
Studies have shown flavonoids can decrease sensitivity to sun and increase blood flow to skin to help improve texture


::CAROTENOIDS::

♥ Foods like carrots, kale, spinach, cayenne pepper, tomatoes, apricots.  
♥ Decreases skin’s sensitivity to sun and reduces skin redness.


::TEA + COFFEE::

Teas used for centuries, known for their healing properties.
Green tea claims to possess anti-inflammatory properties. 
♥ Studies have shown alkaloids in coffee (also found in green tea) help rid body of damaged cells.


::WHOLE GRAINS::

Choose whole grains over refined carbohydrates.
♥ Compared to carbohydrates, whole grains are lower on glycemic index, higher in fiber, can help reduce blemishes.
Whole grains keep you fuller, longer because they don't cause the insulin level spike that refined carbohydrates do.

::SULPHUR:
:
♥ Foods like eggs, garlic.
Key in repairing tissues and elasticity in skin, making it essential for smooth skin.

Tuesday, April 12, 2011

15 Funky Ways to Tie Your Laces!

How cool is this?? So many amazing ways to lace up your sneakers! Check them out to add a super unique twist to your look. Children of the 80s, who remembers doing the Checkerboard with their Kangaroos! Hahaha! :P

*I do not own these photos. They were sent to me via email so full credit goes to Puma and whoever else owns these photos.


Sunday, April 10, 2011

Brushes 101: Essentials vs. "Good to Have" (Ideal Info for Beginners)

If you consider yourself a newbie or totally lost when it comes to makeup, then one of the most intimidating areas can be makeup brushes. I should add here that many makeup artists prefer using their fingers for certain applications, whether it be for a particular look or just personal preference. It's totally okay to use your fingers, but there are some aspects of makeup application that are far easier with the right brush. Let me share what I have discovered to save you the legwork.

This post will outline what I consider the "must have" essential brushes and the "nice to have" extra brushes. That should help reduce any beginner's anxiety!


::ESSENTIAL BRUSHES::

1) Fluffy All-Over Eyeshadow

These brushes are from the Shopper's Drug Mart "Quo" line.

I'm including these as essentials because they're multipurpose. First, although you may absolutely use Q Tips or your fingers to apply your eyeshadow (make sure your hands are clean!), brushes like these make life a lot easier especially if you're just beginning. They pick up just the right amount of product and you can deposit the shadow onto your lids with better control.

You should initially pat the eyeshadow onto your lids (instead of "rubbing" it) to ensure its lasting power, but you can also use these brushes to do a little blending. Furthermore, these brushes can double as facial contouring or cheekbone highlighting brushes (more on that below) so you don't have to drop mad cash on brushes.


2) Blending


The white tip brush is one of my FAVES. Holy grail brush! It's the MAC 217 blending brush. 
The brown tip one is the Smashbox #10 Crease Brush. The bristles are stiffer and fan out more than the MAC 217, which makes me feel less in control. I adore the 217 and have several of them.

I consider blending brushes absolutely essential. Whereas applicator brushes can be substituted with fingers or Q Tips, you definitely need a brush or three to blend out your eyeshadows so there are no harsh lines. Blending takes a bit of practice but once you get the hang of it, it is the key to flawless, professional-looking eyes. I'll do an updated blending tutorial soon. If you want a good blending brush, definitely pick up the MAC 217. This brush is also multipurpose; you can use it to blend out concealer, highlight cheekbones, etc. Just an all-around lovely brush!


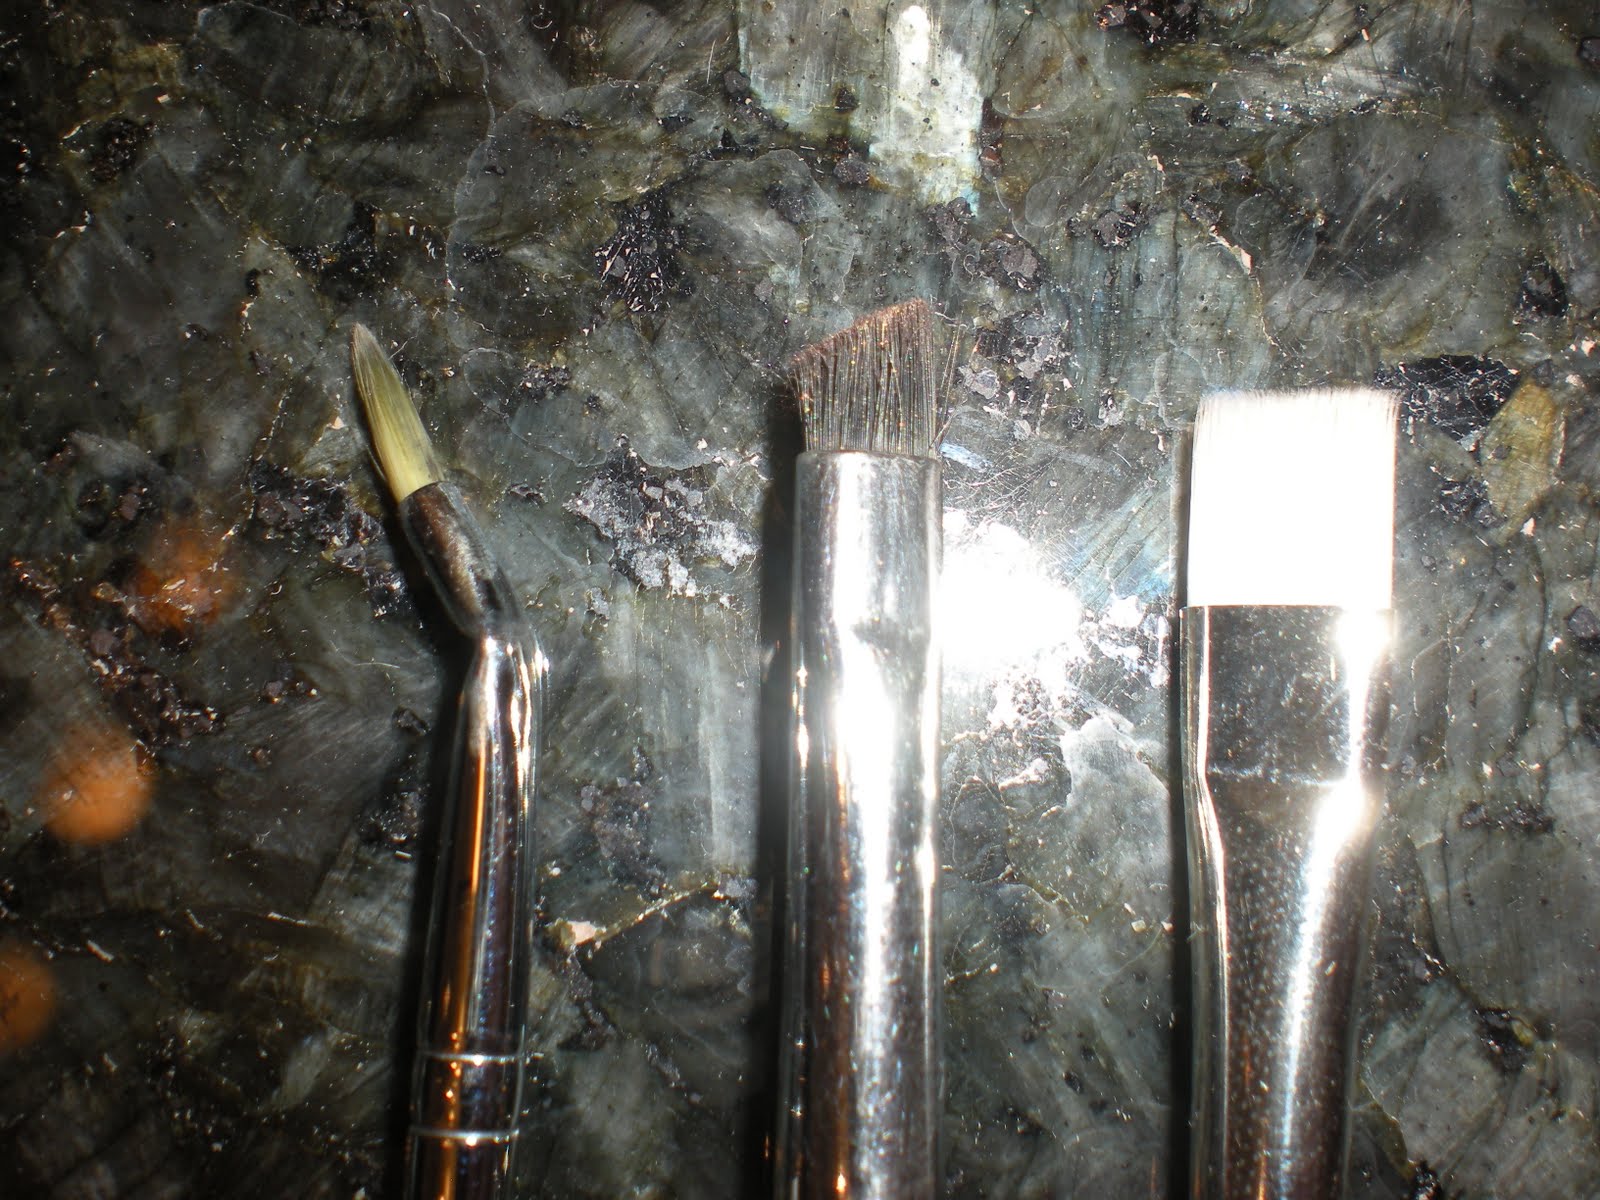
3) Liners

The two brushes on the left are from Shoppers' Quo line and the one on the right is from Sephora.

Your makeup brush collection should include one or several of these types of brushes. Again, the theme is multipurpose. You can apply gel liners with these brushes or wet your eyeshadow and line your eyes with that rather than using pencil liners. If you're a beginner and aren't good with eyeliners, my tip is to wet one of these brushes and dip it into a brown or black eyeshadow. Line your eyes with this method instead - it looks great and it's amazing practice for you to figure out the shape and contour of your eye.

You can also use these brushes to fill in your brows (no special brow gear necessary - any matte brown shadow that suits your colouring will work. I'll do an updated brow tutorial). As well, you can use these brushes to highlight the inner corners of your eyes with light shimmery shadows, an important step in brightening your overall appearance. Do get one of these brushes for your set - totally indispensable! If you're just going to get one, I recommend the middle angled liner for its versatility.


4) Angled Powder


This brush is from Quo. Use it for blush and cheek contouring (brown colour shown above).

For the face, an angled brush is very important. To slim your face and create all sorts of contouring, you will need this brush. It can also be used to apply blush. Updated contouring tutorial to come.


5) Kabuki

This retractable kabuki is from Posh.

I've included a kabuki brush in the essentials section because after you apply blush and/or contour, it is extremely important that you buff out any harsh edges. The kabuki has dense, stiffer bristles for the job, unlike any other brush (i.e. blush or large powder). I like to take this brush and make wide circular motions along the top and bottom of wherever I've applied blush/contouring, and also a little on top of the colour - but not so hard that it removes what I've applied. Blending with a kabuki is the trick that will give you that pulled-together airbrushed look you see on people.


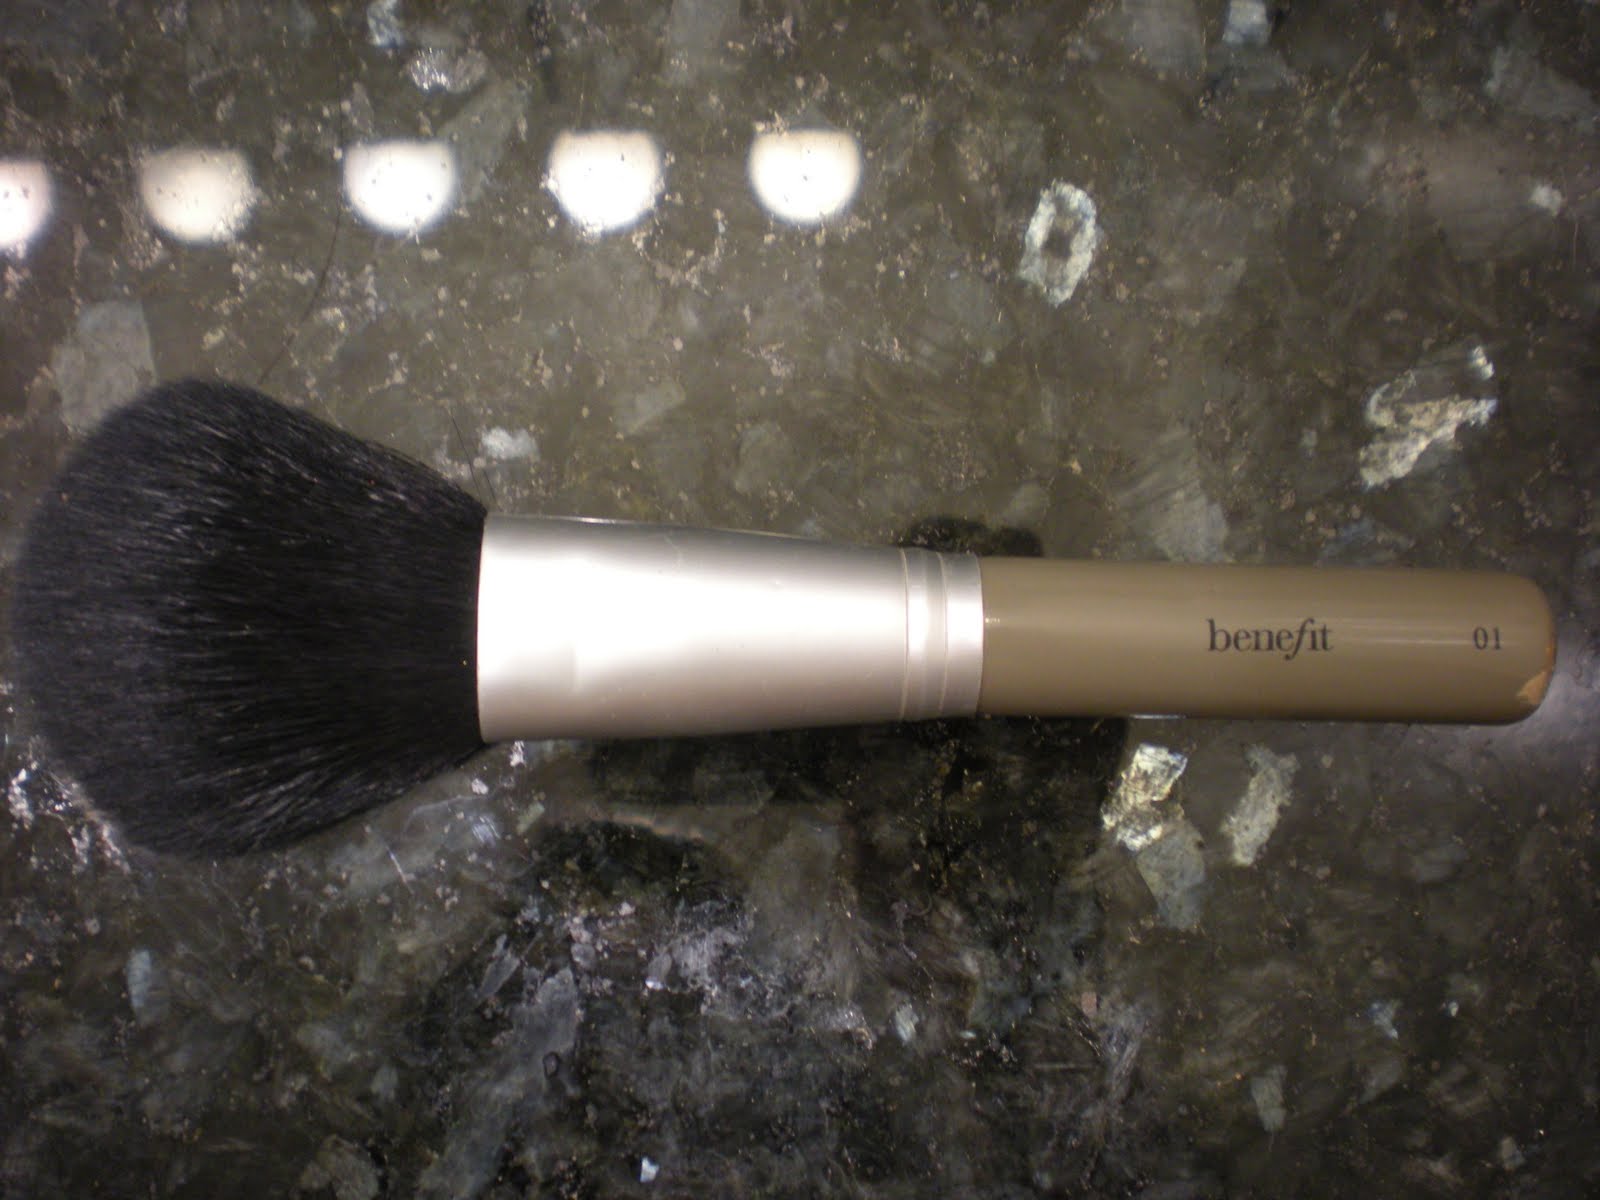
6) All-Over Large Powder

This brush is from Benefit. It's real pony fur instead of synthetic bristles so it tends to shed a lot.

This brush is the final essential piece for your basic collection. It's a large all-over brush for loose powder application. It is hard to replicate the function of this brush with anything else, which is why I've included it under essentials.


::"GOOD TO HAVE BUT NOT COMPLETELY NECESSARY" BRUSHES::


1) Concealer or Flat Foundation

This brush is from e.l.f. It's medium sized, not too big.

This brush is good to have but not totally essential. The reason being, you can always apply foundation and concealer with your fingers. To apply foundation with your fingers, dab a few spots of it all around your face, then blend with your fingers. The heat of your fingers will help smooth everything out. To apply concealer with your fingers, tap on the concealer without rubbing it off. A tiny concealer brush is good to have for problem areas, but again, it's not completely necessary. Some makeup artists swear by tiny concealer brushes because it can reach the smallest surface areas, so that would be the next brush I'd recommend you get for your collection, outside of the essentials.


2) Stippling

This is the MAC 287, a large synthetic stippling brush.

This brush is really neat to have because its synthetic bristles and soft "stippling" build make for an airbrushed smoothness when you apply foundation or blush. It's a great no-brainer brush for beginners and might be something to consider purchasing after a small concealer brush.


3) Flat Shader Eyeshadow

This is the MAC 242.


Once you master the use of all-over eyeshadow brushes, this flat shader brush is good to have for patting on pigments or loose eyeshadow. Not totally necessary though, especially for beginners.


4) Pencil

This is the MAC 219.

I love this brush for blending out shadows along my lower lashline, particularly for smoky eye looks, and for accurately placing highlight shadows along my inner corners. However, I lived without this brush for many years and used a combo of my angled liner and MAC 217 blending brush (white tip). That worked just fine. But if you have the money, pick up this brush at some point. You can also use this to define your "outer v" area of your eyeshadow or blend out concealer. Get creative with it!


5) Angled Contour

This brush is from Quo.

This brush is a small, stiff, fluffy angled brush meant for contouring areas like the sides of your nose with better accuracy than a larger contouring brush. However, as mentioned in the essentials section, you can easily dupe this brush with a fluffy all-over eyeshadow brush. I just included it as an interesting addition. Definitely the least necessary of all the brushes you should purchase! :)

Holy Grail Foundation: VICHY DERMABLEND CORRECTIVE FOUNDATION

It's been a long time y'all! Since I've been away, I've discovered some amazing products that I'd like to share with everyone. First up!


::VICHY DERMABLEND CORRECTIVE FOUNDATION::


::WHERE TO PURCHASE::

The Vichy Dermablend Corrective Foundation can be found in Canada at any Shopper's Drug Mart. It only costs about $25CDN, which is half the price of cult fave foundations from MAC or Make Up Forever. That really helps if you're like me and prefer to blend two colours together to get the perfect match all the time.

For US residents, check out Vichy USA for a store locator or to shop online. I've linked you directly to Dermablend, but there are tons of other Vichy products listed on the site. It lists Dermablend as $29USD - maybe there's cost increase due to import mark-up? :S

*Tip: Blending foundations is highly recommended regardless of brand. Sunny weather is fast approaching for those of us up north, so we'll want our foundation to custom-match every stage of our healthy glow. Furthermore, we all know that everyone's skin tone is different. It's nearly impossible to find a perfect match with just one foundation, even without tanning issues. Those with fair complexions should try blending customized proportions of #15 OPAL and #25 NUDE. If you're darker or olive-skinned, try mixing #45 GOLD with a touch of #35 SAND for more dimension.


::THE HYPE::

I can't say enough about this foundation. What I absolutely LOVE about it is the amazing AMAZING coverage it provides. It literally acts as a concealer as well as a foundation. I have lots of red patches and discolouration from blowing my nose (perpetual sinus issues), acne scars, etc. Dermablend covers up everything IMMEDIATELY. Unless you have serious scarring or redness, you will not need concealer. As well, if your skin is clear and you don't want to use foundation all over your face, you can use this foundation as your concealer and only dab it onto problem areas. You can also just use it on your T-zone and planes of your cheeks.


*For my medium yellow-based skin tone, I mix about 3/4 of #25 NUDE and 1/4 of #45 GOLD. I will increase the 45 depending on my tan this summer.  


::INSANE COVERAGE and INCREDIBLE LASTING POWER::

Because this foundation was allegedly created for reasons much like BB Cream - for people recovering from chemical peel redness, rosacea, and other scarring, it really goes above and beyond any foundation or BB Cream I've ever used.

Dermablend feels lightweight like you have nothing on your skin at all, yet it does NOT budge! I'd even go as far as to claim it's almost waterproof. If you blow your nose aggressively and very frequently like me, I'd recommend using a concealer to minimize potential redness around the nose. But if not, then this foundation alone will last you all day. You basically need makeup remover (or olive oil if you want to go natural/cheap) to really clean this foundation off your face, yet it's not greasy and doesn't clog pores.


::ZERO CAKINESS::

With all its staying power, you would think this product would be cakey. False. Cakiness is one reason I've avoided full-cover foundations in the past. MAC's Studio Fix provides great coverage but no matter how I applied it, I would always look like I slammed my face into pancake mix. Not cute. Dermablend on the other hand doesn't produce any cakiness whatsoever. Strangely enough, it's mostly mattifying yet still provides a light dewy glow. Kind of like magic!


::A LITTLE GOES A LONNNNNG WAY::

I'm not joking when I say you do not need much product to cover your entire face and neck area. You can use a foundation brush or your fingers to apply - both work - and basically just pick up the product by feathering at the edges of the blob. As you apply to your face, blend the product really well and you will immediately see how far a tiny bit will take you. This also means that for half the price of a typical higher end foundation, you will have a wonderful product that will last you for ages.


#25 and #45 blended, pre-application (with flash)


#25 and #45 blended, pre-application (without flash)


::NO FUNKY SMELLS::

Dermablend has no weird scent. In addition to cakiness, another reason I reluctantly dropped MAC Studio Fix for Make Up Forever's HD Foundation was the fact that I couldn't stand how heavy MAC SF felt and how badly it reeked of paint and oh, turpentine. It was so revolting that I had to stop using it entirely. What a waste of money! I still enjoy MUF's HD foundation, and I'll continue to use it for evenings when I know I'll be photographed, but Vichy Dermablend is now my go-to daily holy grail foundation. Hands-down winner.


::NOTE::

My Dermablend doesn't appear to come with SPF, but the ones listed on the Vichy USA site seem to be SPF20. Remember that if you're getting photographed, SPF will give off a sheen, so be sure to mattify your face with powder if you're using the SPF version.

Wednesday, February 10, 2010

Short Hiatus!

hi all! it's been awhile since i've updated my blog or made a new vid. please bear with me, as life has been really busy. i'll be back soon!